Happy Spring, everyone! This winter season has been an odd one with very little snow and balmy temperatures. I am already thinking about the growing season: fresh herbs and veggies that come straight from our yard to the dining table, yum. In today’s post, I want to provide you with step-by-steps on how to DIY raised garden boxes. This is a great way to turn an unused corner of your yard into a fun outdoor project. You can have your own garden and start growing vegetables in no time!

There are many different materials you can use as planter boxes. Cedar fence pickets, wood pallet, cinder blocks, concrete blocks, metal containers… The easiest way is to use 2x lumber (pine commonly used in construction). For beginner gardeners, this is the easiest to build and the least expensive.
Materials
- Pressure-treated lumber (2×6, 2×8, or other 2x lumber)
- 2×2 cedar board as garden cage + metal wire or black mesh
- Exterior wood screws and hinges
- Perimeter: weed barrier, rocks, or mulch
- Other: garden soil, irrigation, seeds or seedlings
Cost: $30 for two 4 feet x 2.5 feet planter boxes, $150 for the 4 feet tall cage.
Is it safe to use pressure-treated lumber to build vegetable gardens?

You may wonder if the chemicals used in pressure-treated wood would seep into the soil or are harmful. Based on my research online, the risk posed by these chemicals is very minimal. Due to safety concerns, since 2004 manufacturers have replaced chromate copper arsenate (CCA) wood. The level of chemicals in pressure-treated wood nowadays is so low that it is okay to use it to build food-growing garden beds. If you use untreated wood, the garden bed can rot and break down in a few years’ time.
If you’re concerned though, line the wood with plastic fabrics as a precaution.
Choosing the gardening site and prep work

Before you start digging, pick a site that gets enough sunlight and plan out how big your garden will be.
Tip: You want to build a planter box 5 feet deep or less. You can have a garden as long as you want, if your site allows. But if it is too deep, you won’t be able to reach into the center without stepping inside.
Our backyard is sloped and north facing. Most of the yard is covered in shade 10am-4pm even in the summer. Luckily the area next to the fence gets plenty of sun exposure and is pretty much a wasted space. As a result, I decided to turn this bold area into a tiered raised bed garden.
Compared to an in-ground garden, a raised bed garden allows us to build on top of the soil without disturbing the root system of nearby plants or having to dig deep into clay or rocks. It’s a lot easier to set up (or remove) and is easier for our backs.
How to build raised garden bed step by step
Step 1. Level the site
If you have a sloped backyard like us, enjoy the workout LOL. Digging rock hard soil is hard work.

We dug out dirt and leveled all 4 sides of the garden beds. The soil was compact, with rocks mixed in it. Even though we didn’t fully level the inside of the bed, we loosened the soil to help promote drainage.
Step 2. Measure, cut and build garden boxes

We built two garden boxes, 4 feet long x 2.5 feet deep each.
Since the 2x8s are pretty sturdy, we just butt joint them and used GRK star head exterior screws to secure the boards, 2 on each end. Make sure to pre-drill to prevent splitting and check if the corners are nice and square.
Step 3. Place the garden boxes

Because we’re building on a slope, we wanted the garden boxes to stay in place and won’t slide down. We stacked the boxes and used pocket hole screws to keep them together. Once we add soil, the entire structure weighs down and won’t move easily.
Make sure the planters are level on all sides.
Tip: if you have gophers or animals that dig underground, add a layer of chicken wire at the bottom to keep them from entering your garden.
Step 4. Build a cage or an enclosed fence
The biggest challenge we have with this backyard veggie garden is wild animals. We have an unfenced yard. Critters like rabbits, deer, squirrels would stroll around and use our garden as a salad bar, if we keep the space wide open.
Kelin from Hydrangea Tree House has a great tutorial on how to build a garden cover. I adapted her idea to fit our tiered garden bed.
First up, make all the cuts for corner posts. We cut ours 4 feet tall and 3 feet, so they will be at the same height after installation. We secured them to the inside corner of the garden boxes.


Tip: use a pole level and clamps to make sure the wood frame is square and level.
Next, measure the distances between the corner posts and cut the 2×2 cedar boards accordingly. Build a rectangular wood frame, then screw in from top.


Following that, measure the opening for the doors and cut the 2×2 cedar boards. staple on hardware cloth or metal wire and attach the gates with weather-resistant hinges.


Tip: you can square up a frame without corner clamps. The key is to first clamp down the corners with just enough pressure to hold the boards together, then measure the diagonals and make sure the distances are equal, once the box is a perfect rectangle, tighten the clamps all the way and secure with screws.
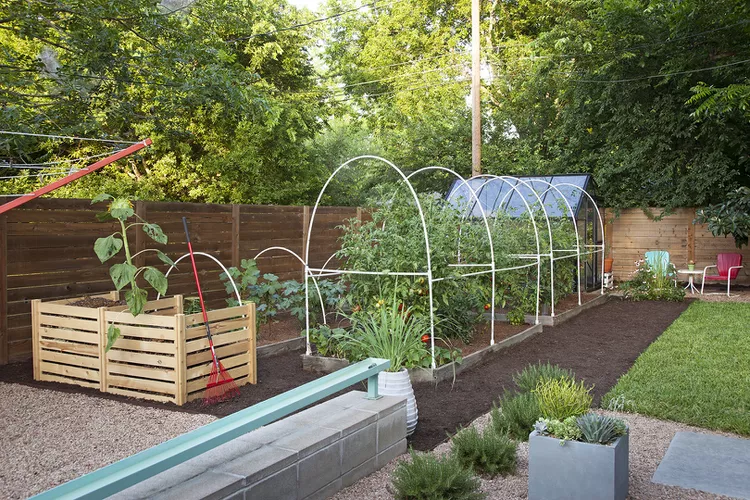
Clever cage idea: an arbor made with PVC pipes
Step 5. Add soil
Add gardening soil to the raised bed. Mix in plant food. Layer mulch on top to help keep the moisture in.
The taller your raised bed garden is, the more soil you’d need to fill up the space. Or you can use organic matter at the bottom. For my 4’x5’ garden, I had to haul 7 large bags of garden soil. It was definitely a workout.
Step 6. Landscape the perimeter of the garden
To finish off, lay down weed barriers around the perimeter of the raised bed garden and add mulch or rocks. This is optional. But it makes your garden look a lot prettier and easier to walk around.

We didn’t set up an in-ground irrigation system but programmed our OTO sprinkler to water the garden once a day.
How are the garden beds holding up?

Our tiered vegetable garden is holding up well after more than 2 years. This will be our third growing season in this garden. The cedar-made cage hasn’t bowed out or wrapped too much and is maintaining its shape. Compared to a couple other outdoor projects I’ve done (that’s for a later post), it stood strong over time.
What I’d do differently
Although I love having this easy-to-set-up garden, one thing I would change in the future is the 4-feet-tall cage.
The cage works well for low-profile plants. However, the high-yielding Early Girl tomatoes that we loved kept outgrowing the cage and poking through the net in September. It’s not a big deal. But it would have been nice to allow the tomatoes to grow taller and produce more fruit for us.
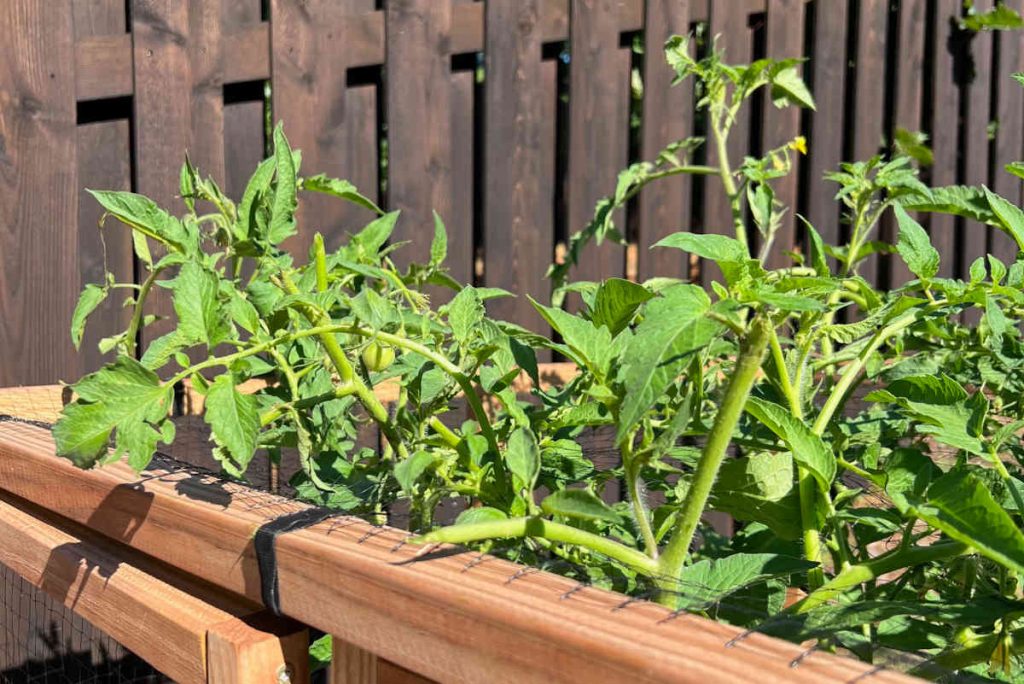
This year if time allows, we may use thicker lumber (e.g. 4x4s) to fence the entire garden. We will also replace the black mesh with metal wires as a more permanent barrier. Even though the black plastic mesh kept majority of the critters away, it still got chewed away in certain spots by our ferocious visitors.
Garden then and now
This raised garden boxes DIY is an easy way to add planter beds to the yard or a small space. The design takes less time to build and doesn’t need a lot of wooden boards.


I hope you like this easy tutorial. This is my quick and easy, deer-proof DIY raised garden bed.
Tasting that fresh, nutritious vegetable right after harvest is unbeatable! Nothing in store can compare to the yumminess of home-grown food. Have fun gardening!
My other outdoor DIY projects:


Leave a Reply